I was thinking about building full-scale MO from Disney/Pixar movie Wall-E and have it ready for Dublinmaker event on 25 July 2015 in Dublin Ireland. I teamed up with my friend Mike Hibbett, an electronic wizard. He knows everything about electronics and programming and likes to share his knowledge in “Everyday Practical Electronics” magazine.
We started designing MO Droid mechanics on a napkin, quite complicated robot balancing on top of the ball. We even started building a prototype with 3 stepper motors and omni wheels. We found on YouTube few working examples, the best was this one
We knew it will be a challenge but probably possible to make. My biggest worry was shifting the weight of the whole figure while he is moving arms and head, I wanted him to be very articulated. In the meantime, the first trailer of new Star Wars Episode 7 was released showing the new BB-8 droid. It looked great and seemed to have much less moving parts. We were still at beginning of built so decided to change the project and tackle another ball robot. A quick search on YouTube and we found a video of an acrylic sphere with weight shifting mechanism to control the turns:
From the video, we could see that it can provide the speed like in the trailer, but it was not clear how well it will turn. We decided to test it on a small scale so I started from scratch using cheap 10cm diameter plastic ball, one Styrofoam ball, 2 servo motors, one converted to a continuous rotation and 2 micro-controllers with a cheap 2.4gh link through nRF24Lo1 boards stuck to interior 3d printed on my homemade RepRap. In the meantime, the video from Star Wars celebration was released showing the real working BB8 droid. I knew it was huge, so I assembled what I had, spent the evening painting the ball and released very poor quality video with footage of my few tests before plastic ball cracked. The mechanics worked alright, but the connection of the main axis and ball was not designed properly.
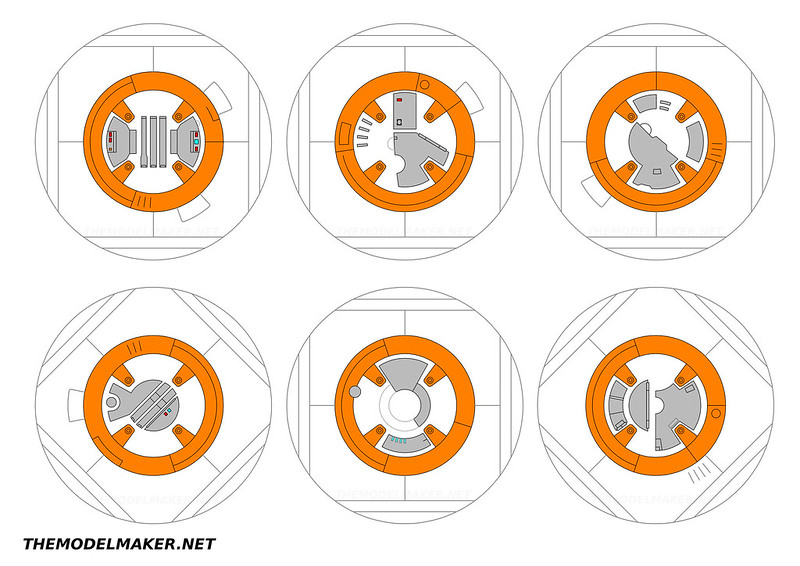
The new photos of BB-8 started appearing online of the stage droid and static props so I prepared this set of blueprints. I noticed that details of working animatronic version of BB-8 are less sharp and groves are not that deep as on the prop displayed next to Storm Troopers. It is probably to avoid edges on which dome could rapidly stop and fell off the magnetic device hidden inside the main ball. Feel free to use this plans for your own project of customized Sphero, cake, or anything you are building there. That should save you some time trying to figure out all the shapes of panels details. If you are planning something more movie accurate, look for better reference. This drawing was based on very limited reference materials at the time I was creating it and published 19 April 2015.
I started figuring out the scale of the robot based on photos from the stage where he was standing next to the R2D2. I had the approximate dimensions and even found the seller with acrylic domes online. It was costing few hundred euro with shipping to Ireland, quite an expense for a project which may never work or remain unfinished like my animatronic dragon which turned to be too time-consuming for one person with a limited budget and crappy homemade 3d printer.
I started distracting myself with other projects and abandoned BB-8 idea. I still watched how others are doing, especially interested with Xrobots version 1 which reminds me my original attempt with MO project. James must be a genius, he quickly created BB-8 version 1 along with other projects while producing very informative videos for his YouTube channel. I am so jealous of his knowledge, skills, and talents.
I also joined the BB-8 builders club on Facebook where I could see the development of multiple concepts of mechanics and movie accurate droid thanks to the power of community and combined engineering skills from people around the globe. They spent hundreds of hours designing and testing and generously sharing the 3d files ready for printing in plastic.
In the meantime, I replaced my homebuilt Printrbot with budget CTC clone of Makerbot Replicator which turned to be much more reliable and more precise machine than my previous bot. I was tempted to start printing BB-8 every time when I saw a Club post on my facebook timeline. The only thing which stopped me was the calculations of how much time it will take for my single machine to finish the job.
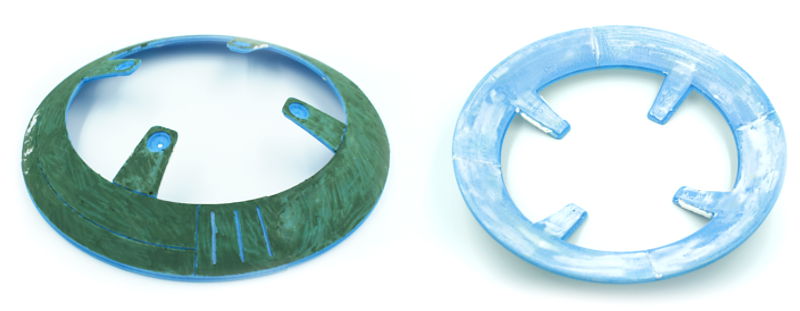
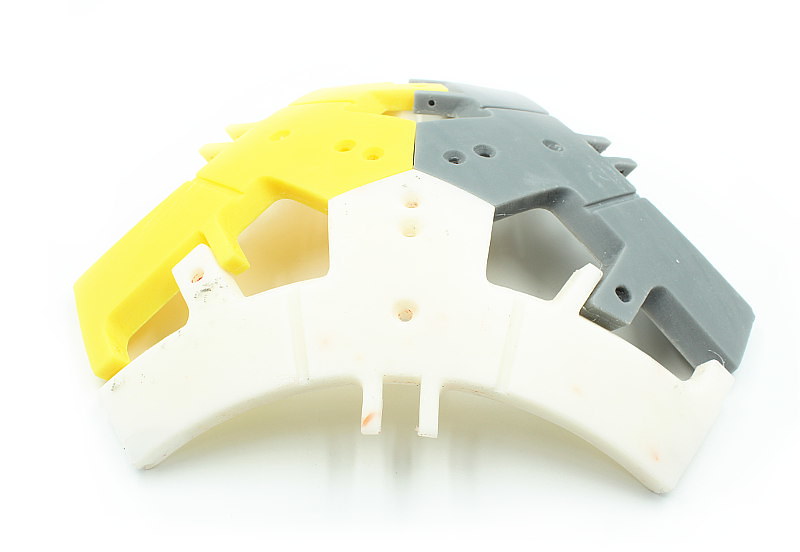
Only when I saw the modular design of the inner sphere designed by Cary Christie I realized I may speed the process. His amazing design contains 24 identical elements which joined together form the sphere. I printed this as the first part to get the sense of scale. I used minimum infill and 2 perimeters just to get the light version to hold it in hand and it looked so cool with all the ribbing and attachment points. It feels like the part of the serious machine, real robot. It took 5 hours and 30 minutes to print while proper and durable part would take around 9 hours. I would need 24 parts like that so just 216 hours of printing if everything goes well, that’s 9 days nonstop printing and I can’t leave the machine on when going to the office. I started thinking about molding and casting. It turned that I need to print 3 parts and make 3 molds to get a majority of the sphere. On top of that, I only need to fill and sand one each what is another time saver. That sounds manageable, I can give it a try, launch the printer while working on something else. I decided to print 1 ring, 1 triangle as a test, if it will be too much, I can always weather them and hang it on a wall 🙂
The whole ring is bigger than my printer’s bed so it is split into 4 separate parts and joined together with super glue. Each took 3hours to print and used 15m of PLA plastic. It was again just 2 outlines and 10%infill, much below recommended in Club instructions. This one will easily crack if put on the finished droid but I only need it as a master for my mold making, finished parts will be cast in solid resin.
They are cleverly designed with little holes, where I put short pieces of a filament and this helps to align the parts. I then sanded them with mouse sander to remove most of the layering. Next used filler putty to cover deeper lines and holes. I looked for Tamiya putty in my local model store but they didn’t stock it so I had to order it from Ebay. On the bottom, I tested universal filler for walls, but it was hard to sand and grainy. In the meantime, I bought Games Workshop liquid greenstuff which looked covered with seaweeds but did a great job. I covered the whole thing and later sanded it by hand. That started the long process of sanding and priming, sanding and priming with each pass getting closer to smooth part.
To be Continued
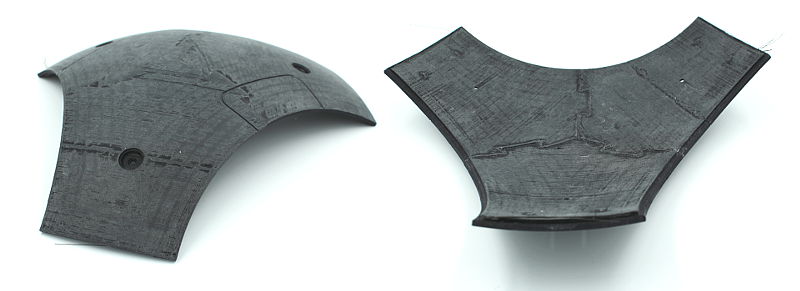
The story continues with triangle panels. They are made of 3 parts joined together. they fit and interlock after just little sanding. In this panel I used Bondo-like material accessible in my local shop with car accessories, it’s called ISOPON P.38 It is very easy to sand and holds very well to plastic. It smells like cancer, so I have to apply it at the very well ventilated area on the balcony and wet sand to reduce very fine dust hanging in the air. I use it to fill biggest gaps or to correct the shape. The smaller holes were later filled with liquid green stuff. Few layers of grey primer and lots of sanding gave me smooth and perfect surface.
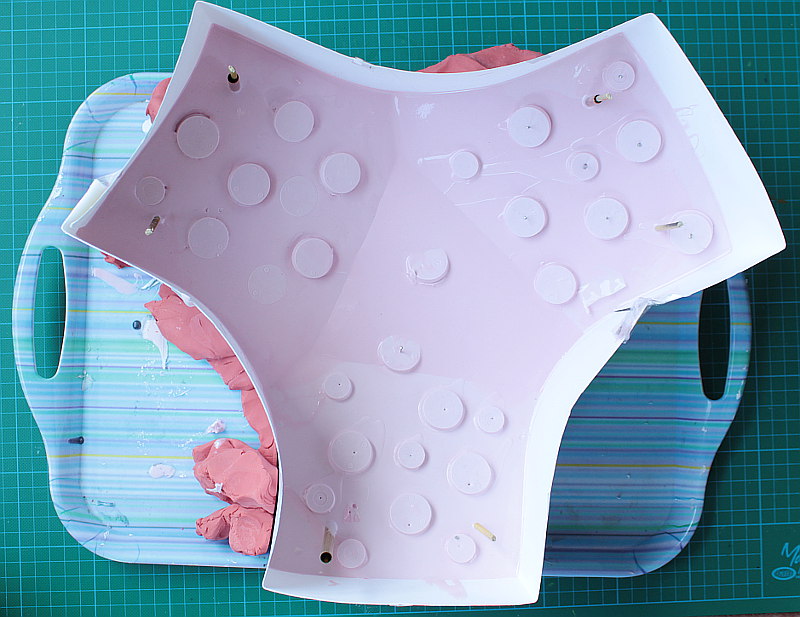
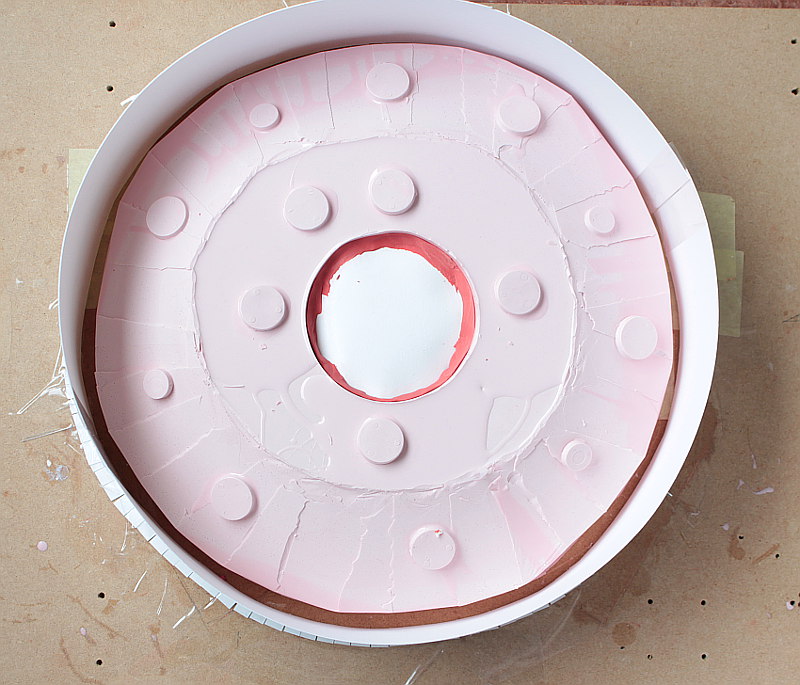
Here is the finished part ready for molding. I fixed it to the wooden board with cheap plasticine. I formed the clear borderline and pressed some registration points using a rounded side of the brush. I surrounded the whole thing with a wall made of paper and fixed it to board with tape. Make sure to fill all the holes so the expensive silicone will not flow and set on your floor. The silicone I used is Polycraft GP-3481-F General Purpose RTV Condensation Cure Mould Making Silicone Rubber and I got it from www.mbfg.co.uk It comes from Belfast with next day shipping. I pour the first half in stages because I was not in hurry. First, the layer to cover the whole part. I shake it to remove all the bubbles which were created on the surface. When it sets, I add more silicone and old molds diced to small pieces at the edges. It is recycling and helps to save some fresh silicone especially on big block molds like this.
I also poured some to the small round plastic caps, will use them later as registrations with mother mold.
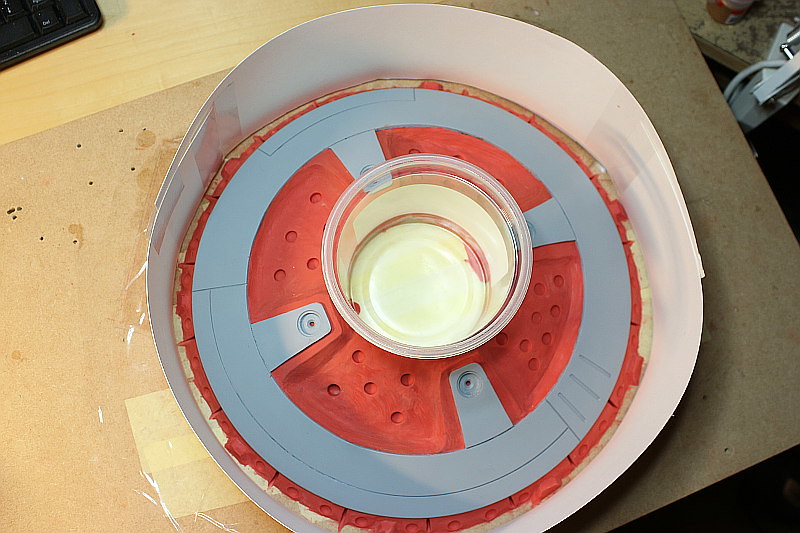
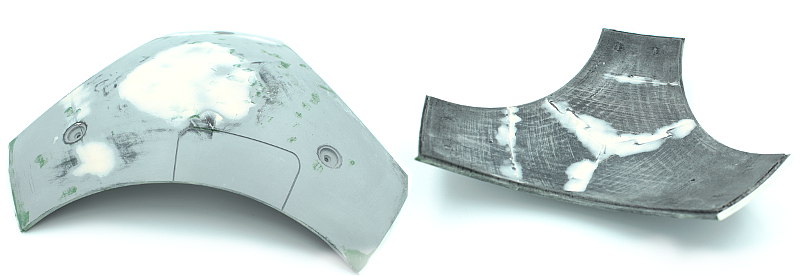
The big rubber piece is heavy and flexible and it deforms easily when filled with resin. To avoid that I created the rigid shell. I used different materials, just for tests and because I had them at home. For triangle I used some out of date resin, I would not use it for parts of the model because it was risk it would not cure properly. Instead of bringing it to recycle center it became a perfect rigid shell and lowered the cost of making this mold.
For the ring mold, I cut the paper wall and fold it inside to follow the contour of the part. It helped to reduce the amount of silicone at places where it was not needed.
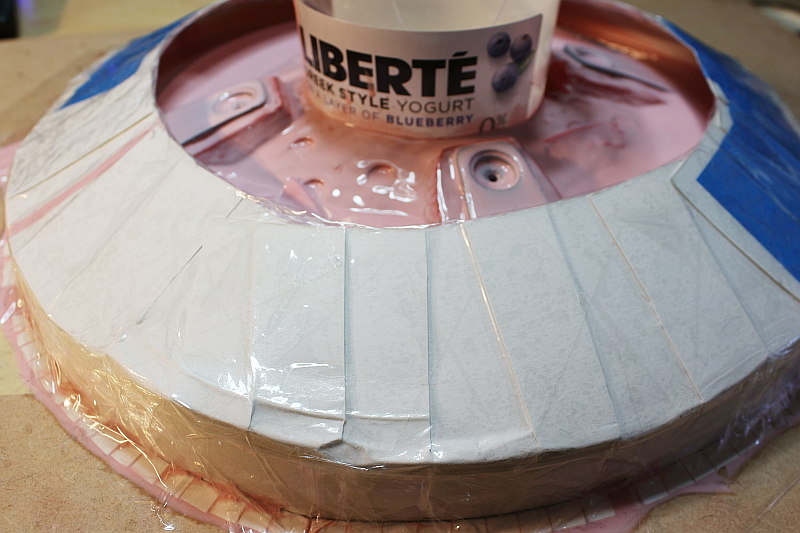
The plastic cup at the center serves the same purpose.
For mother mold I used 6 years old Jesmonite I bought to test it but never really needed it. It’s great material. It is like plaster but instead of mixing it with water it uses acrylic water-based resin. It does not smell and create very rigid cast with a smooth finish. Need to use it for bigger sculptural pieces in future, it can be reinforced with fiberglass mesh and is cheaper than polyurethane resin.
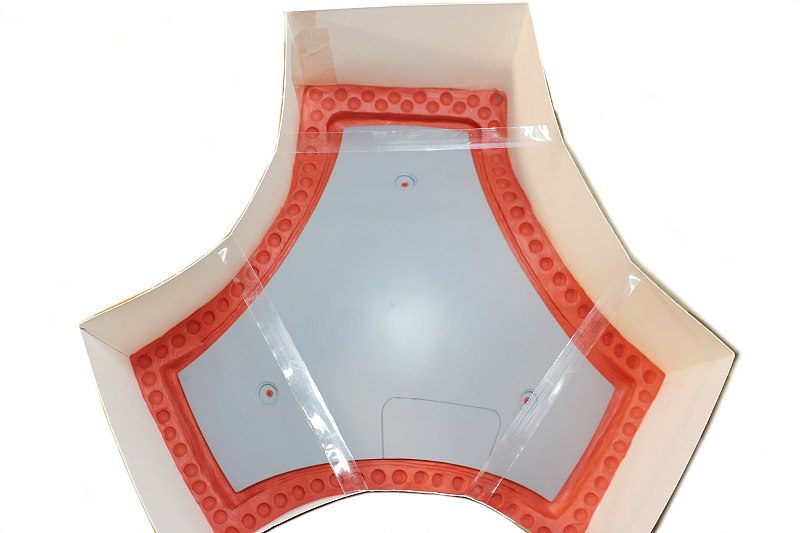
The mold for a section of frame was small enough to use just cardboard pieces on both sides and fix them together with painters tape.
The resin I used is Polycraft FC3000 Polyurethane Roto / Slush Casting Resin It is very durable and quite flexible. It is almost impossible to break what was a problem with test part I made with my usual material of choice for casting plastic parts Polycraft SG2000L Paintable Long Pot Life Polyurethane Liquid Plastic Casting Resin
It has short pot life so I need to mix it fast for 50 seconds and fill the whole model with one go. It’s less viscous and starts to gel quickly. I had to enlarge my pouring holes and use small paper funnels made of paper so I can fill them one by one, letting it flow inside cavities. After I estimated the correct quantity of the liquid, I was able to produce all parts in one day. Demolding time is 20min so just enough to prepare and use 2 other molds while first one is curing.
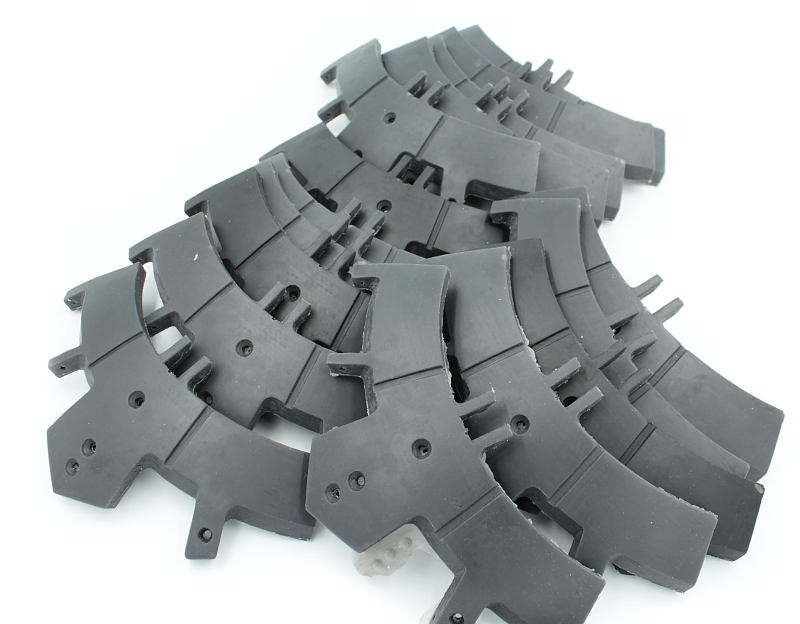
I used black dies for the frame but I wanted it to look dark grey so put less than needed for the fully saturated colour. The rings were made with orange, so it will be less visible when paint is scratched.
The triangles were made with pure resin which produced white parts. Here are the test pieces, the yellow section was by accident when I forgot to add red to make it orange.
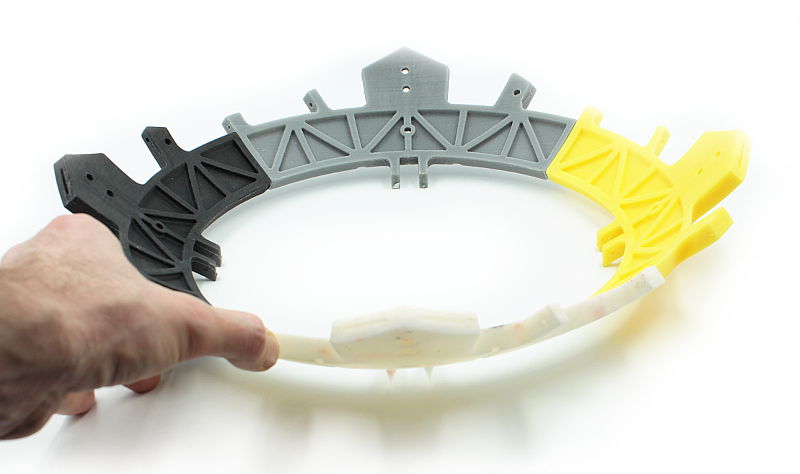
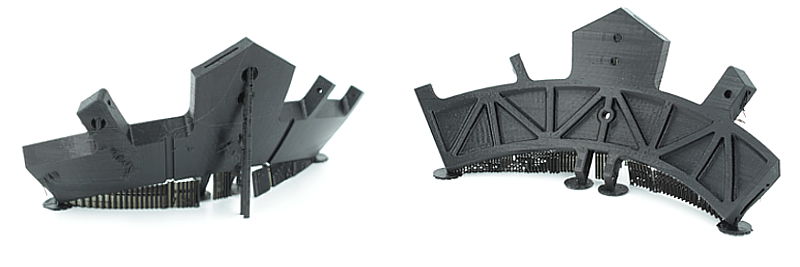
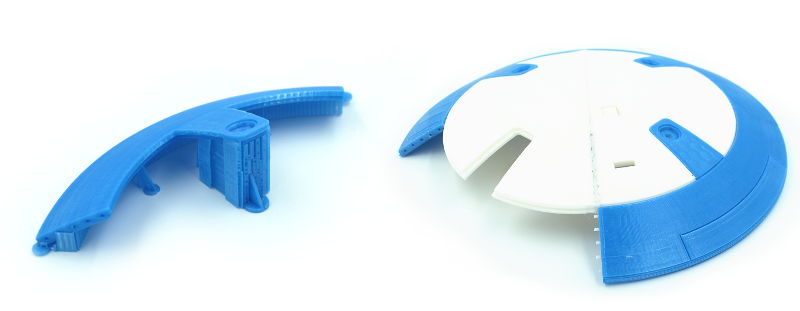
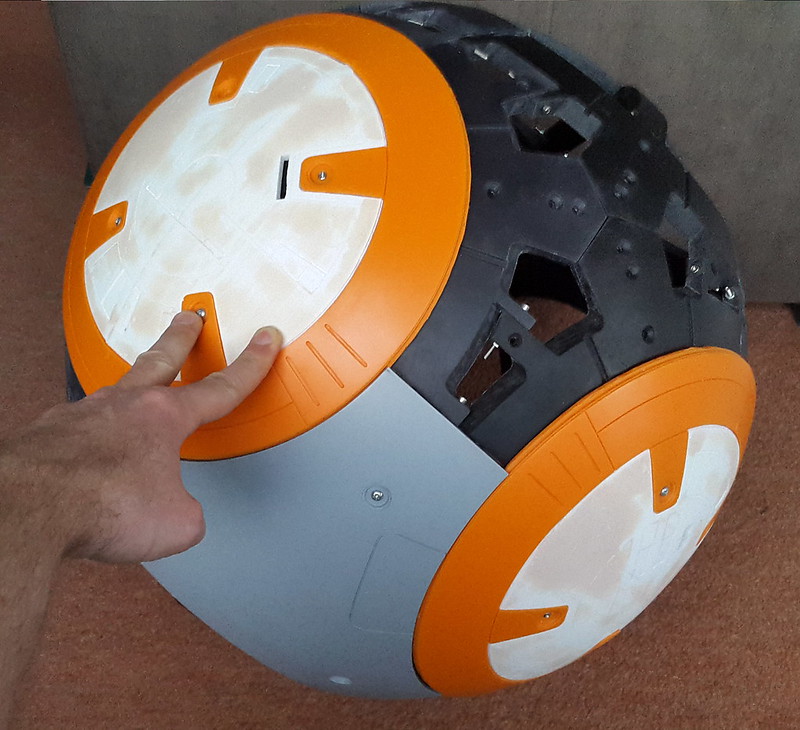
The frame went great, it needed some cleanup of flashing and the holes need to be drilled with Dremel. The plastic is almost unbreakable when I try to bend it but very easy to cut with a knife. It may be a bit too flexible for the frame. When testing single element, I was concerned that it will bend too much with the full weight of mechanism inside. When assembled the whole sphere with all bolts and 3d printed ribs in place it became very solid and rigid. After adding external panels, it feels unbreakable. I was even tempted to push it off the stairs and see if anything breaks 🙂 Thank you Cary Christie for your clever design and all contributors who prepared the external panels. The more I go forward with this project the more amazed I am with the amount of design and test work you did. Now I was able to print them and everything fits and is easy to assemble just like any plastic scale model. In the meantime, while I was building that, Cary designed and released injection molded sphere, which is perfect and will save you lots of time and trouble with printing and cleaning all 24 pieces.
There are 3 types of the ring but I only printed one. I modified 3 casts slightly to make other types. It was easy and required to fill few lines and cut few in other places. I used Exacto knife to cut the groves and later Dremel bits to sand it and make even. After the painting, it will be hard to discern which one was modified. I used the same technique to create vents on few of the triangle panels.
The center pieces are all different so had to print each of them. They are made in 2 sections, glued with superglue, the joint reinforced and filled with PLA using 3d printing pen. You can get one for as low as 20bucks from banggood here. It is a very useful tool for filling cracks and joints, I need to test it someday to 3d sketch the whole object, I saw many movies what’s possible and I am curious if I could make it too.
After printing and sanding all six center panels, I decided I want a static BB-8 with special features like thumb up and opening drawers. I found the channel Xlrobots where he shows his tests, design work and finished a prototype of animated center panels. They are tested and work great, there should be enough time to make them for Dublinmaker so started printing them. I can always swap them if I need the rolling robot in the future. The mechanism is another layer of complications so I will live this part for after the event on 22nd of July. I prefer to have something finished to show this year and slowly collect all the electronics and motors for the second stage of this build.
While I was assembling the sphere I noticed 2 triangles were thicker than the rest. I cast few more and used the leftovers and extra ring as an experiment if it will be strong enough as a shell only glued permanently. It looked like it may work so I cast more triangles and rings. When I superglue the last panel the semi-flexible panels created a very rigid sphere, it felt as strong as the one with the skeleton and it was easier to build and the panels stay in place without gaps in between. Its perfect for static build already but wanted to go further and reinforced it with few layers of fiberglass. Now its stronger and could probably hold the mechanism for rolling robot easily. The cons, it’s permanent and can’t be disassembled, the painting and later fixing of scratches will involve lots of masking. The resin I used inside smells bad even after 2 weeks.
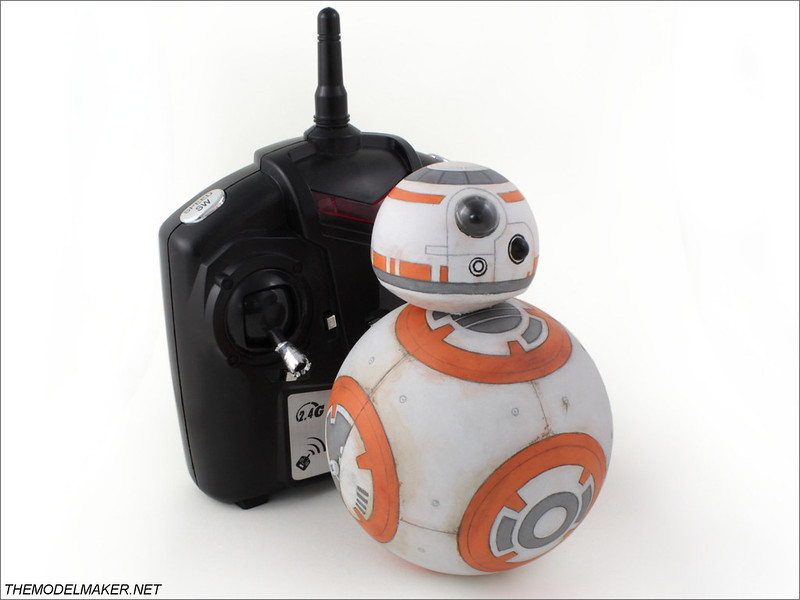
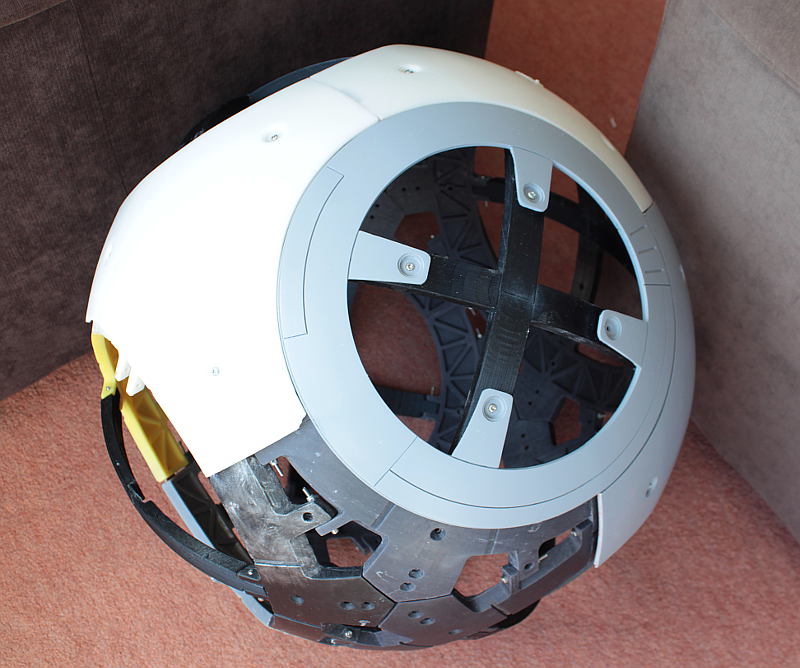
I finished the built on time and an event was a great success. My stand was busy all day long with crowds of people, touching and hugging, taking selfies and trying to figure out how the head moves. Some of them thought it is reacting to their movements so they moved left and right or covered the lens to see if it will follow. The secret was little joystick operated by me or my friend who helped me to inject life into character when I answered the questions about the process. I brought to my stand my printer which was working on parts for a new lighter version of the head dome, that showed visitors how long 3d printing process was. It was also surprising for some, how big the whole droid was and how small the printing volume is. I also had the second sphere with open panels on the table, which gave the opportunity to show what is inside and how cool the internal frame looks. I painted it with silver spray paint to give it a metal look.