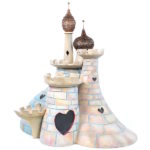
It’s a Small World Epic Scale Model inspired by Disney
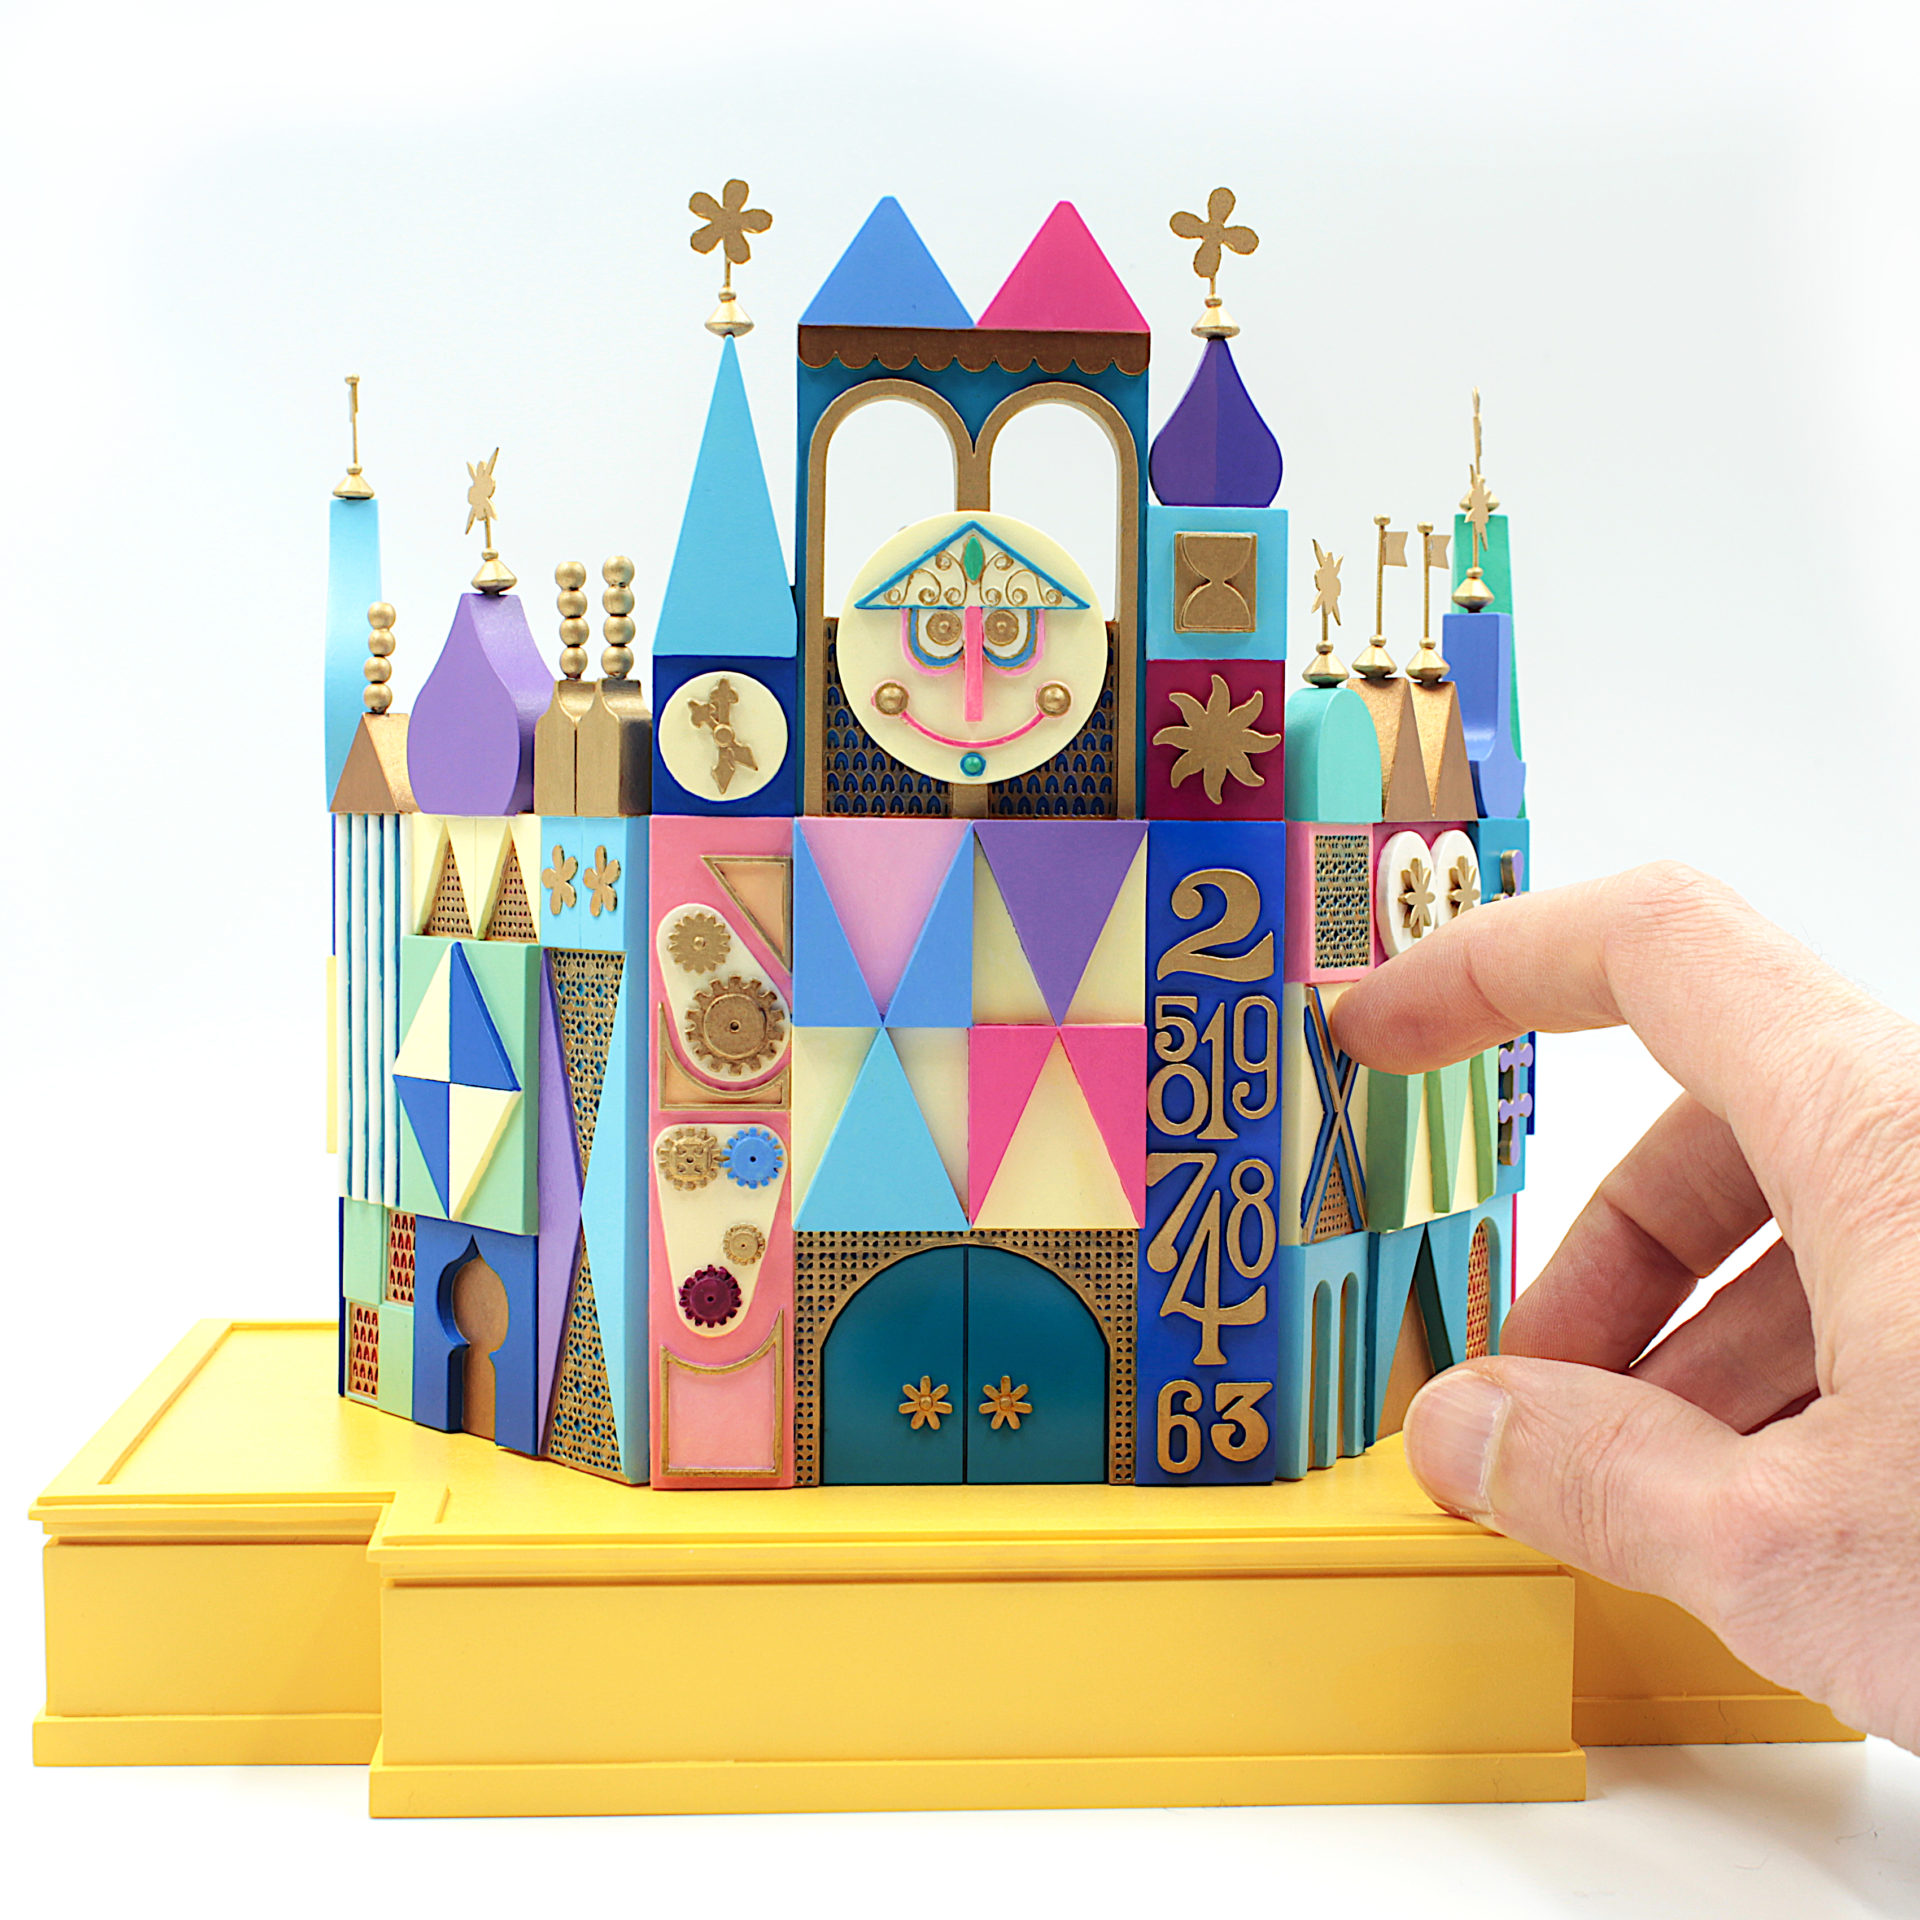
“It’s a Small World” is a timeless attraction at Disney parks around the world, and creating a scale model of this beloved ride is a true labor of love. My latest version of this project was inspired by the ride…