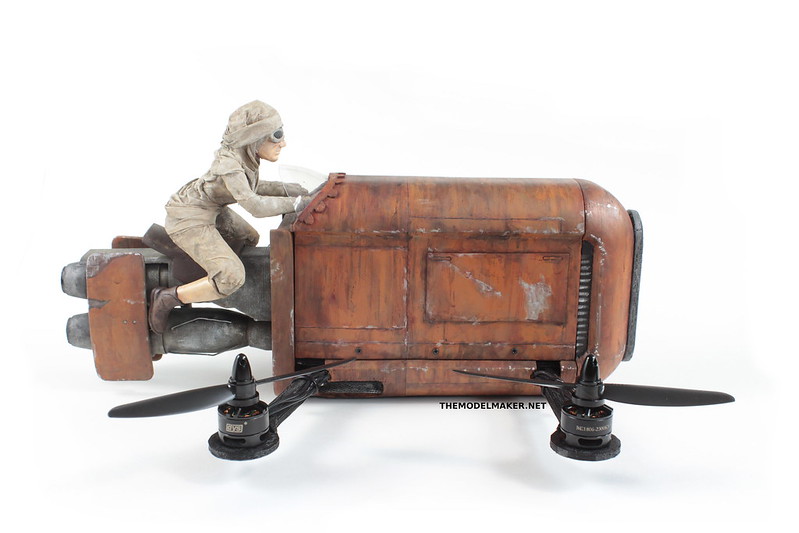
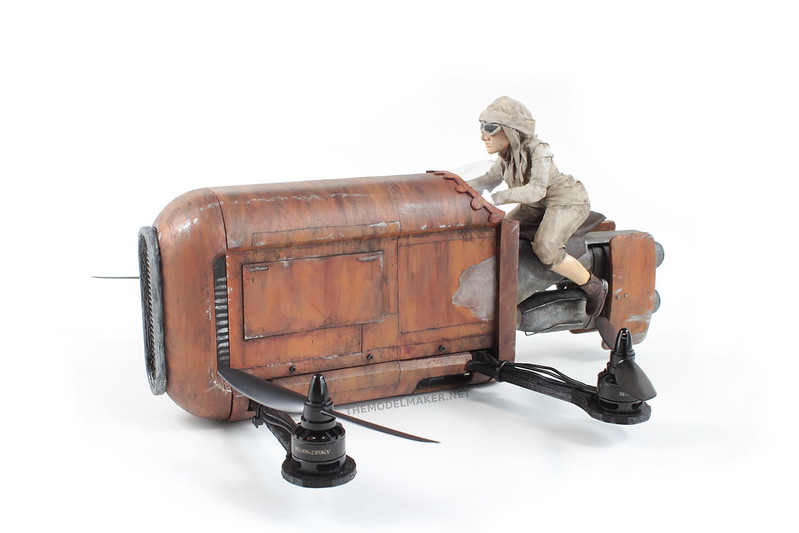
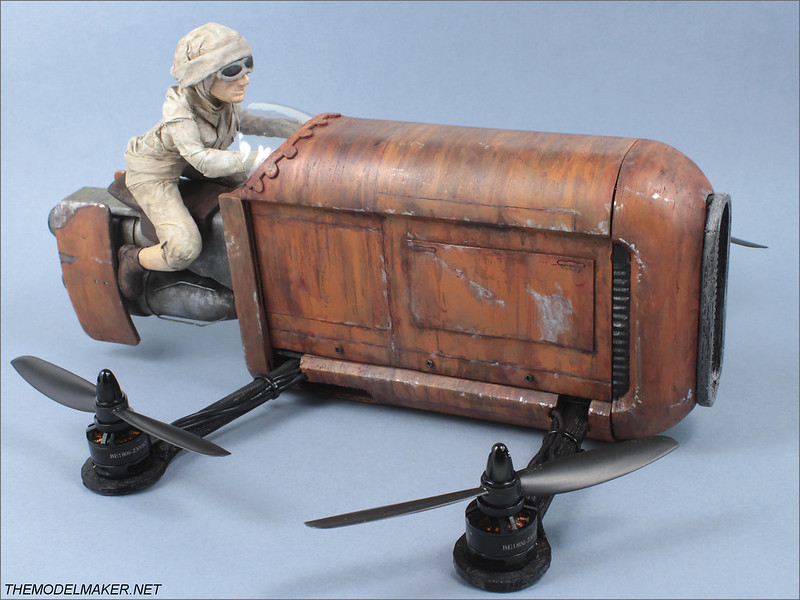
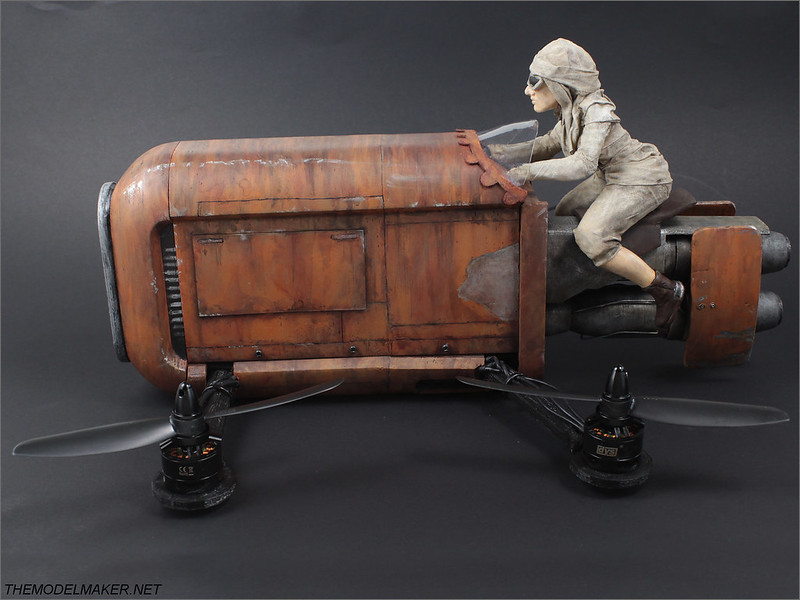
While waiting for new part of Star Wars I decided to build another project on this theme. Here I present you 3d printed and flying version of Rey’s Speeder Bike as seen in the trailer of new Star Wars: Episode VII The Force Awakens and directed by J.J.Abrams.
I had the idea to create Rey’s Speeder as custom quadcopter since I first saw the trailer but was busy building other projects including my racing quadcopter. I first built 3d printed foldable quadcopter called Hovership but was horrible pilot and lost it in the Irish Sea with my GoPro camera attached on one of the first tests. It was huge hit for my ego and the pocket, but I recovered after few weeks and started building second 3d printed craft, this time hexacopter. This was great flyer but broke arms every time I crashed it while training. Then I built one based on very popular carbon fiber frame ZMR250 which finally let me spend many hours in the air so I could learn how to control this thing. Now I can fly between the trees and can call myself decent pilot. I will be training on weekends to take part in future FPV racing championships but in the meantime, I am ready to build something custom, using the experience gathered during my last 3 builds plus many other projects you saw on this site.
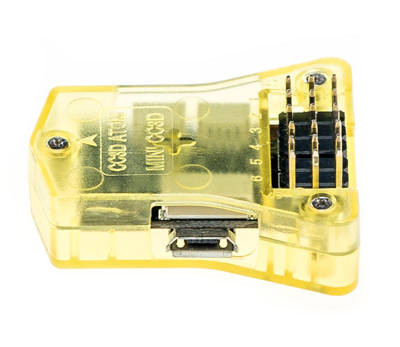
I am using the same components I already tested on my previous crafts. They are easily available and not that expensive when ordered online. For flight controller I am using CC3d because it is very easy to configure, its small and can cost as low as 15usd with shipping from Banggood.com. Here is the full list of components I used for this build with links and prices to help you find them and estimate if your budget allows you to build one for yourself.
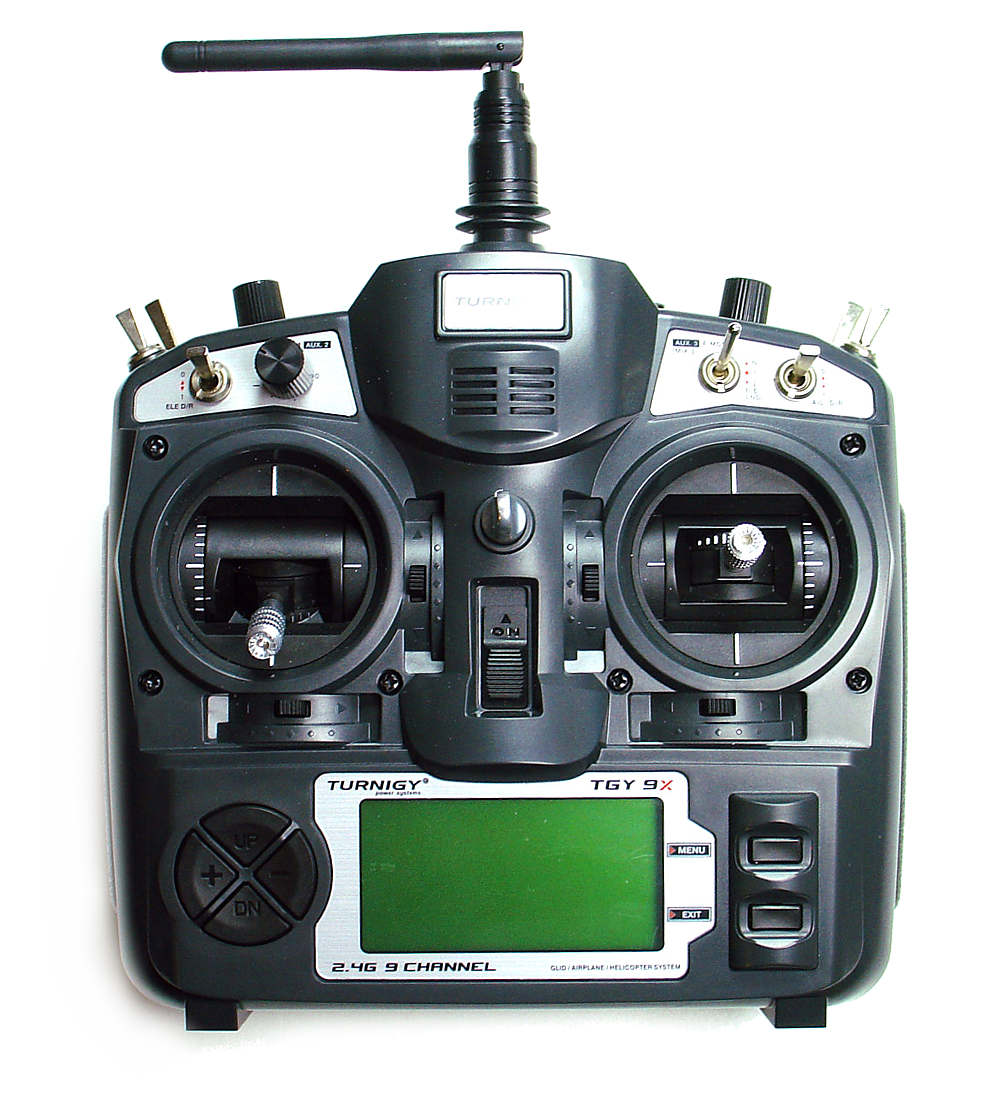
Additionally you will need a transmitter and receiver to control your craft. The good thing is that if you have one, you can attach one of your receivers. If you start in this hobby and don’t want to spend too much at the beginning just to test if it is for you, start with Turnigy 9X. I have this model and I am happy with it so far. It is known for good value for little money. It costs only 60.35 USD for a set on Hobby King and its easy to buy additional receivers (9 USD) for my growing fleet of flying models.
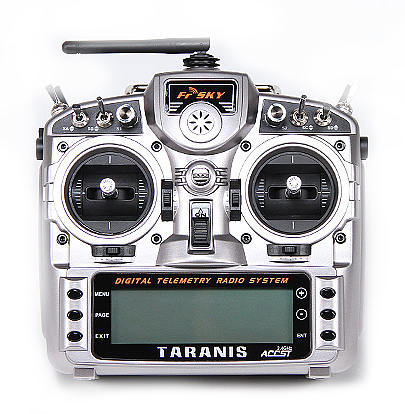
If you want something better, very popular is open source radio called Taranis with all advance functions the most expensive brands have, but for much lower price. I see only good reviews of this radio everywhere and I am planning to upgrade to it before next flying season.
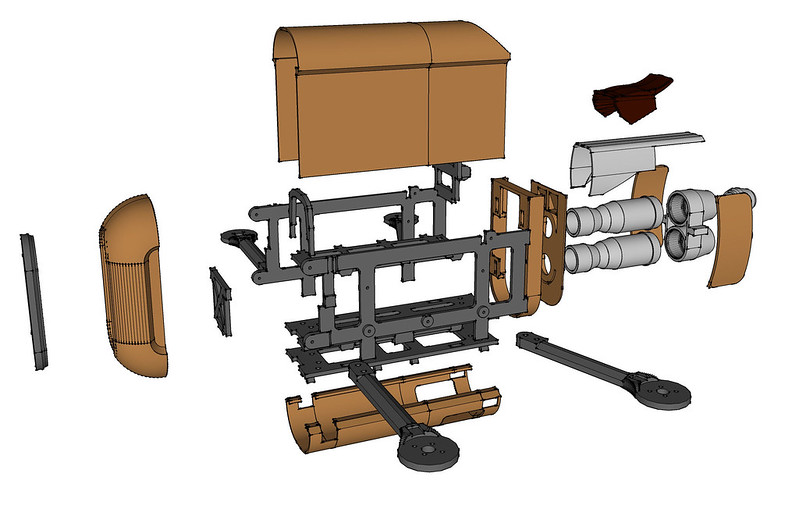
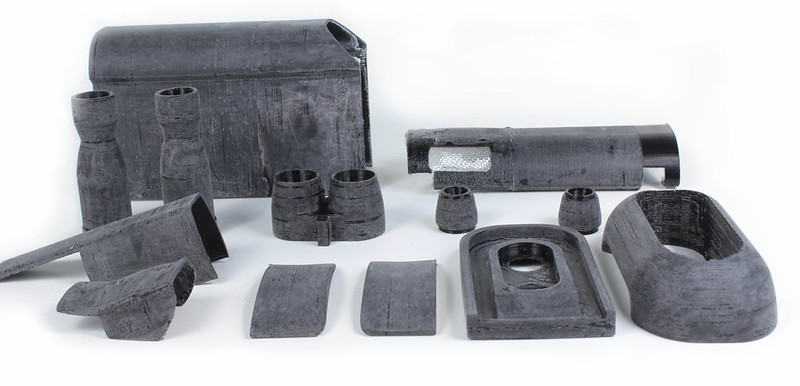

I designed all the parts of this Rey’s Speeder quadcopter in Google Sketch-up and based it on photos I could find online. It is broken into pieces which would fit on most home 3d printers and all parts are prepared to be printed without use of support material. I tried to make them as light as possible without sacrificing strength, but all elements add up to 500g for just frame only! I know it is a lot, but I am aiming for cool look, not for performance on drone racing championship with this one. The weight can be slightly lower when you print with lower infill settings but then, it may break more often when crashed. I am also going to change few parts based on experiences with first prototype, so your 3d printed model may be lighter.
The weakest parts were external panels , I noticed that they will be the easiest to break on crashes, they started breaking while sanding already. I strengthen them with one layer of fiberglass cloth and resin. It added 20g to weight of 50g top panel but couldn’t risk that it will crack on first rough landing when its sanded, painted and weathered.
My home made 3d printer is not the best quality, but I was planning to sand all external parts to get good and smooth finish. This allows me to use lower resolution and 0.7mm printing nozzle to increase the printing speed. This model is bigger than things I usually build and full of accessible planes, so great help was little electric sander.
The pilot body was made of Styrofoam to save on weight. I cut rough shapes with sharp knife and covered it with pieces of cloth and PVA glue. I made sure that all the pieces of fabric create realistic looking folds and creases on trousers, and joints are hidden on internal side. The parts of the body which were not covered by clothes, are sculpted with polymer clay Sculpey and pinned to the rest of body. If you don’t feel like sculpting it all, you can cover everything and save some time and weight, because clay parts weighted more than rest of the body. Everything was later painted and weathered with acrylic paints.
The motors I had at hand were DYS BE 1806 2300KV . I used them on all of my previous copters because they were cheap to play and I ordered 12 of them for hexa and other experiments with flying objects. They were good enough for entry class quadcopter with FPV, small Xiaomi Yi camera and spinning 5inch propellers, which I still enjoy flying. They are only 80W and they need 2/3 throttle to lift this model off the ground with small and flexible 5inch propellers. This is not recommended for any quadcopter, because its hard to control it and it moves like a tank. I will need to replace them with something more powerful. For my firsts major upgrade of FPV quad, I ordered Sunnysky X2207S KV2100 which can provide 350W of power each! That with 6inch propellers and 20A ESC should solve the overweight issues, I will test it when parts arrive and before putting them on my primary racing quad.
Update: I gave this setup another chance with new plastic but more rigid 6inch propellers (6045) It worked very well. It has more power and more stable, so it was finally easy to control. I thought that it will kill this little motors, but after few minutes of flying, I didn’t notice any white smoke and the motors were not even warm. Here is the video from this second test in the park.
This means that I will stick with little motors for a longer while. I planned to put fpv gear on-board, just need to replace front grill with new print with round opening for camera mounted under battery compartment.
You can build your own Rey’s Speeder model like this if you have your own 3d printer and some free time during winter. The parts are free to download from Thingiverse. If you don’t own a printer, you can use the www.3dhubs.com service which will let you find the shop or Maker with printer near you, meaby even your neighbor you didn’t know about, and he can print it for you for a small fee based on printing time and cost of materials. It is already 24500 service providers connected to this network, so chances are, there is few in your city. Here is the button with link to the files.

If you are familiar with quadcopters, you can use any motors and electronics you have at hand. If it is your first build of this type, you can use the ones I tested and listed in this blogpost. They are affiliate links so I will be getting points or percentage of sales but your own price will not change because of that. This small profit will help me to experiment more with electronics and build other custom models in future ( I have 2 more ideas for movie inspired flying objects on my list of things to do, just need time to make it). If you want to build your Rey’s Speeder or racing quadcopter and at the same time support me, please use provided links to purchase your parts or any other things you are interested in. I am buying most of my components from Banggood and so far never had problems with this seller. Thanks for reading and your support. If you have questions about this build, write a comment, I will add the answers and clarifications to my text so it will be easier to build it yourself.